I really enjoy my games against Dave but he does have a the tendency to... well... win, I was hoping that my new fangled unit of Hive Guard could help to turn this around and give me a long awaited victory against Dave's Marines.
Mission: Kill Points
Deployment: Pitched Battle
Pictures and Text Summary below:

Quick army shot of my 'Nids before the game

Marine Deployment
Tyranid Deployment

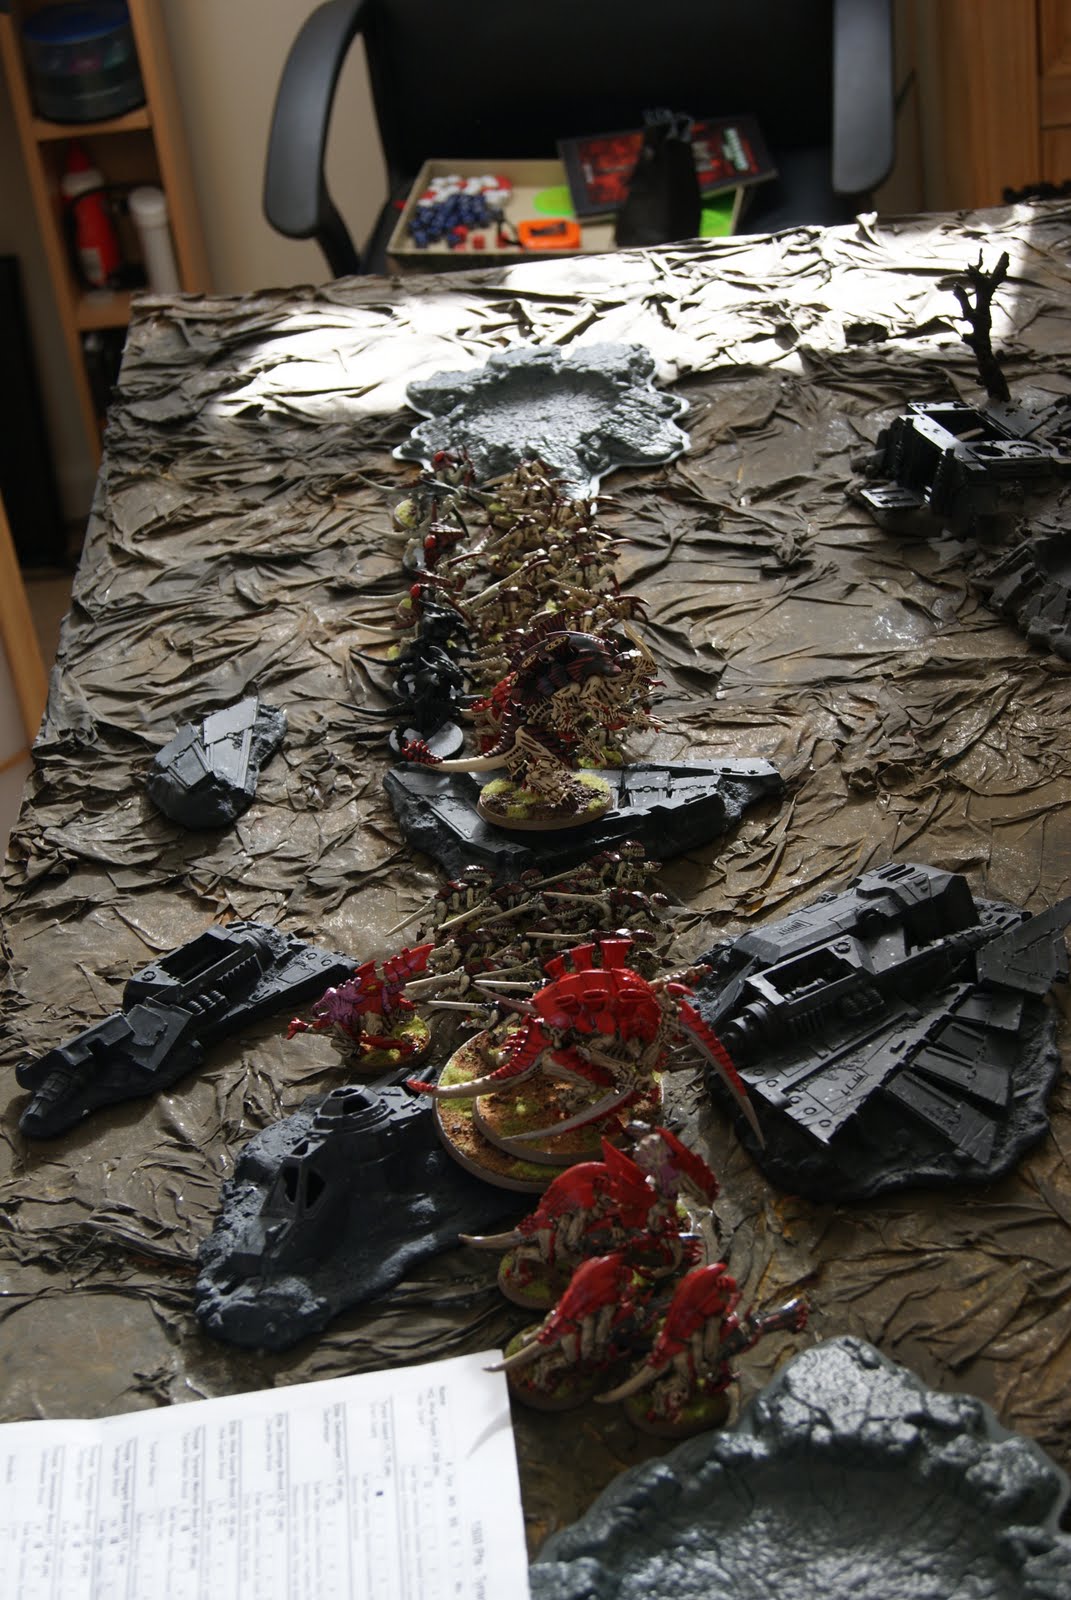
Full table pic after deployment

Turn One - Marines 2 // Tyranids 0
General tyranid advance to inside 24”. Hive guard disarm and immobilise the librarian’s razorback, biovore kills one missile launcher.Central vindicator advances, no other movement. Nullzone allows heavy infantry to kill both zoanthropes, before the vindicator and everything else removes one brood of termagaunts (and wound the tyrant).


Turn Two - Marines 4 // Tyranids 1
Main body continues to advance, slightly slowed by woods on their left. Deathleaper appears on the floor below the right-hand heavy tacticals. Hive guard destroy the central vindicator.
Remaining vindicator advances and smokes. Israel’s razor advances 12”, disembarks sternguard and Israel (Kantor) next to stealers in wood. Other sternguard disembark also. Israel’s sternguard cripple the stealers, who are finished off by other units. The devastators frag the hormagaunts, who are then also finished off by supporting fire.
Remaining vindicator advances and smokes. Israel’s razor advances 12”, disembarks sternguard and Israel (Kantor) next to stealers in wood. Other sternguard disembark also. Israel’s sternguard cripple the stealers, who are finished off by other units. The devastators frag the hormagaunts, who are then also finished off by supporting fire.


Turn Three - Marines 7 // Tyranids 2
Tyranids still advancing, tyrant now level with Israel’s guard. Hive guard wreck the second razorback. Deathleaper assaults the tacticals, but no casualties.
Vindicator closes on tyranid warriors and kills three of six, before the heavy infantry finish them off. Light infantry shoot the biovore. The tacticals (within 12” of Israel) kill Deathleaper.
Vindicator closes on tyranid warriors and kills three of six, before the heavy infantry finish them off. Light infantry shoot the biovore. The tacticals (within 12” of Israel) kill Deathleaper.

Turn Four - Marines 8 // Tyranids 3
Spawned gaunts engage Israel and guard. Hive guard wreck the last vindicator. The tyrant engages one light tactical (the tyrant guard) and the librarian’s sternguard (the tyrant). The tyrant guard causes no damage, but the tyrant causes wounds. The tacticals fall back, and the tyrant guard engages the librarian’s sternguard
The tacticals rally. The tervigon is shot and wounded. A spawned brood of gaunts are wiped out. The fight between Israel, the sternguard and the gaunts continues, as does that between librarian, sternguard and tyrant.
The tacticals rally. The tervigon is shot and wounded. A spawned brood of gaunts are wiped out. The fight between Israel, the sternguard and the gaunts continues, as does that between librarian, sternguard and tyrant.


Turn Five - Marines 11 // Tyranids 7
The tervigon continues to advance. The hive guard destroy the crippled razorback. The last of Israel’s guard die. The librarian and the last of his sternguard are killed by the tyrant.
The tervigon is killed – this destroys one brood of gaunts, and cripples another brood, which Israel finishes off.
The tervigon continues to advance. The hive guard destroy the crippled razorback. The last of Israel’s guard die. The librarian and the last of his sternguard are killed by the tyrant.
The tervigon is killed – this destroys one brood of gaunts, and cripples another brood, which Israel finishes off.

Turn Six - Marines 12 // Tyranids 8
The tyrant kills the heavy tacticals on the lower level of the building.
In return , he is killed by lascannon and launcher fire.Turn Seven - Marines 12 // Tyranids 9
With only hive guard remaining, they target Israel and kill him.
In return , he is killed by lascannon and launcher fire.Turn Seven - Marines 12 // Tyranids 9
With only hive guard remaining, they target Israel and kill him.

Overall I think I made a fair few mistakes and there were a few learning points:
Deathleaper: Fluffed it, came in turn 2, opted to keep out of line of sight for next turn charge, charged Combat squad of las/plas marines, did one wound - saved. Next round did one wound - saved, and he was dragged down due to a measly 5+ save. I can't see myself using this guy again, even against an isolated unit like this he doesn't have weight of attacks to get through marines.
Hive Guard: Simply Beautiful, performance below:
Turn One - Immobilised and Weapon Destroyed on a Razorback
Turn Two - Explode a Vindicator
Turn Three - Wreck the other Razorback
Turn Four - Wreck the other Vindicator
Turn Five - Explode the Razorback they had fired at Turn One
Turn Six - Instant Death Pedro Kantor
Genestealers: 5 Sternguard with combi flamer and ignore cover ammo = no more stealers
Tyranid Warrior: Vindicator = Evil - One shot took out 3 Warriors (3/4 failed cover saves), followed by Krak Missiles and Las Cannons taking out the other 3 (No cover as gaunt screen had been blown away earlier in the phase)
____________________________
Couple of questions that came out of it as well as both of us play very little and are still muddling our way through the rules.
Cover - If running alongside cover in base to base contact do you need to roll for move through cover or can you move the full 6"?
Smoke - If a vehicle uses smoke does he get a cover save from Hive Guard?
Independant Characters in Assaults: Can a Librarian direct his attacks at my Hive Tyrant if the Tyrant Guard is still alive or does he have to attack the "unit" as the Tyrant Guard count as a retinue?
Kill Points: Do you get Kill Points for the Tyrant Guard?
Monstrous Creatures: Can they climb buildings? We played it that the tyrant was able to move into the upper floors of the ruins but I'm not sure if this is allowed?
Thanks for reading!
Stokie_Rich
Cover - If running alongside cover in base to base contact do you need to roll for move through cover or can you move the full 6"?
ReplyDelete################################################
Smoke - If a vehicle uses smoke does he get a cover save from Hive Guard?
They still get the cover save.
################################################
Independant Characters in Assaults: Can a Librarian direct his attacks at my Hive Tyrant if the Tyrant Guard is still alive or does he have to attack the "unit" as the Tyrant Guard count as a retinue?
No. The shieldwall rule prevents exactly this. The tyrant can't be targeted during the shooting or singled out in close combat. Read the FAQ for clarification.
################################################
Kill Points: Do you get Kill Points for the Tyrant Guard?
Yup.
################################################
Monstrous Creatures: Can they climb buildings? We played it that the tyrant was able to move into the upper floors of the ruins but I'm not sure if this is allowed?
If they can fit in the ruins, all is good. You don't have to worry about placing the model there if it falls off due the "wobbly model" rule. (see pages 83 and 13 respectively.
Cover - If running alongside cover in base to base contact do you need to roll for move through cover or can you move the full 6"?
ReplyDeleteRunning along side != entering/ leaving or through cover, therfore the whole 6"
Thanks Immortal that's great!
ReplyDeleteReally appreciate you clarifying those points, will keep it noted for next time