Friday 20 March 2015

Last week of Combat Patrol with Dark Eldar

Hi guys,

quick update, Wednesday night I played two more games at the club against the 1st place and 3rd place players (I was 2nd)

First game was against the guy in 1st who was a nice guy and we'd played before and had a good time so I enjoyed the match.

He had something like:

Inquisitor with 10 guys, Plasma Cannon and Heavy Bolter Servitor things in this unit.
10 Guardsmen with 3 Plasma Guns in a Chimera with Multi Laser and Heavy Bolter
5 Guardsmen with Plasma Gun in a Razorback with TL Assault Cannons
5 Guardsmen with Plasma Gun

First turn he advanced and got a shot off with the Assault cannon but the rest was out of range and/or missed.

My turn I moved onto an objective and shot everything at the Razorback, blowing it up and killing all but 1 of the unit inside between everything firing into them (couldn't see the Chimera)

His Turn 2 he moved round with the Chimera, fired the lone Plasma Gunner into one raider exploded it, The Chimera took out a second raider, and the Guys inside fired 3 plasma guns and 2 bolters at the other Raider and destroyed that.

Not a good couple of turns...

So from there I didn't really have much of a chance, two units with Blasters were pinned, all my units were disembarked, and he had his Inquisitor and 10 guys on a 4 pt objective in the far corner... Not happening.

Nice guy though and sometimes the dice just don't work for you, I couldn't pass a jink save for toffee and that Chimera was just absolutely BRUTAL (4 S4 Bolter shots // 3 S5 Heavy Bolter // 3 S6 Multi Laser // 6 S7 Plasma Gun all re-rolling 1's to hit for an objective...)

Second game was against Necrons and this guy was the chap I'd lost as he walked over everyone at Kill Team. (9 Tomb Blades with Ignores Cover Gauss all in single model units at 200pts is crazy)

His list was something like:

10 Tomb Blades with Ignores Cover and 3+ Saves (2 S6 Blast Weapons in here)
5 Immortals
5 Immortals

Dice went horribly for me again and first turn 4 Lance Shots on 2's to wound, and 9 DC shots on 3's to wound, all with no save (didn't jink) and then 36 poison shots left... 2 dead Tomb Blades.

Then to add insult to injury, my Venom holding an objective rolled sabotage, then a 1 for it to explode, then 5 S4 hits, which then blew it up... At this stage I'm thinking this isn't going to be my evening.

Anyway, over the next couple of turns I finished off the bikes for the loss of 2 Raiders and 1 of the units inside them, and one unit of Immortals that had walked across by now. We called it on T4 as he couldn't stop me boosting over to his side of the table for linebreaker without moving his Immortals off the objective which would make the loss even worse, giving me the game at 5-4 (Objective // Slay The Warlord // Linebreaker vs Objective // First Blood)

The dice were horrible to me throughout the game but eventually after firing approx 30-35 AP2 shots and dozens of poison shots the Bikes went down, and the rest was much easier from there, I was saved by the fact that he could only take out 1 target a turn.

After the league table was updated I'm now at 5th with my first opponent still top and the Necron player just below me in 6th. So far I've won 5 of my 6 games but my objective points aren't high enough to lift me any further sadly as some of the games I've won with low scores. (The league is ranked by Objective Score Rate, gained by dividing the amount of Primary and Secondary objectives you have got so far by your win rate)

---------------------


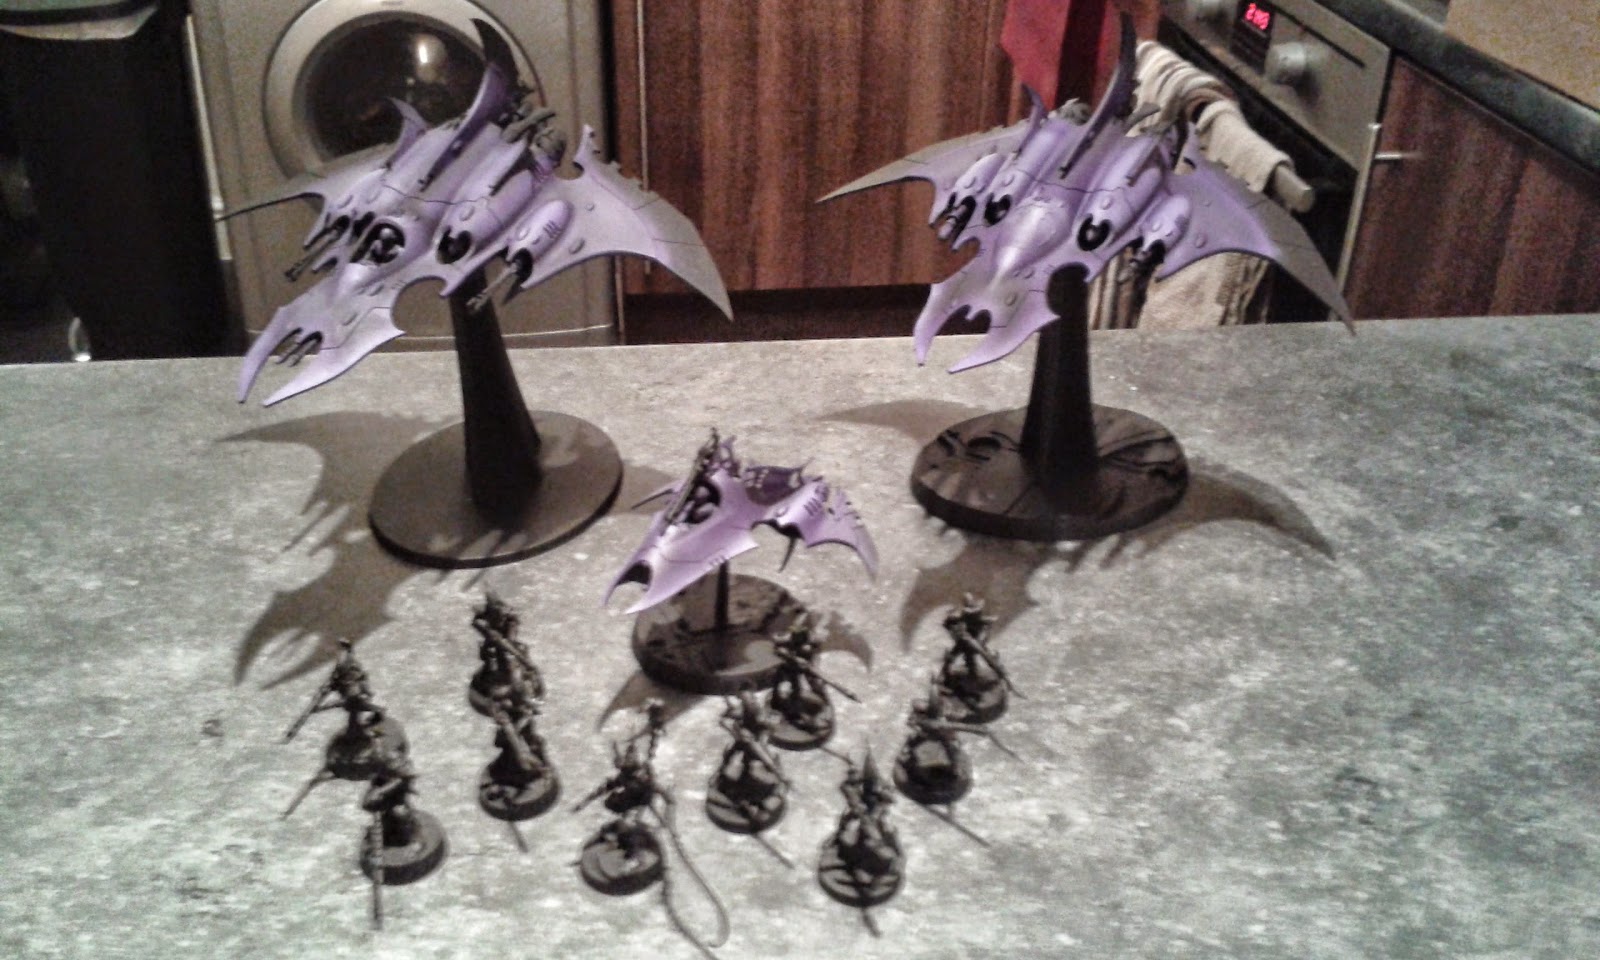
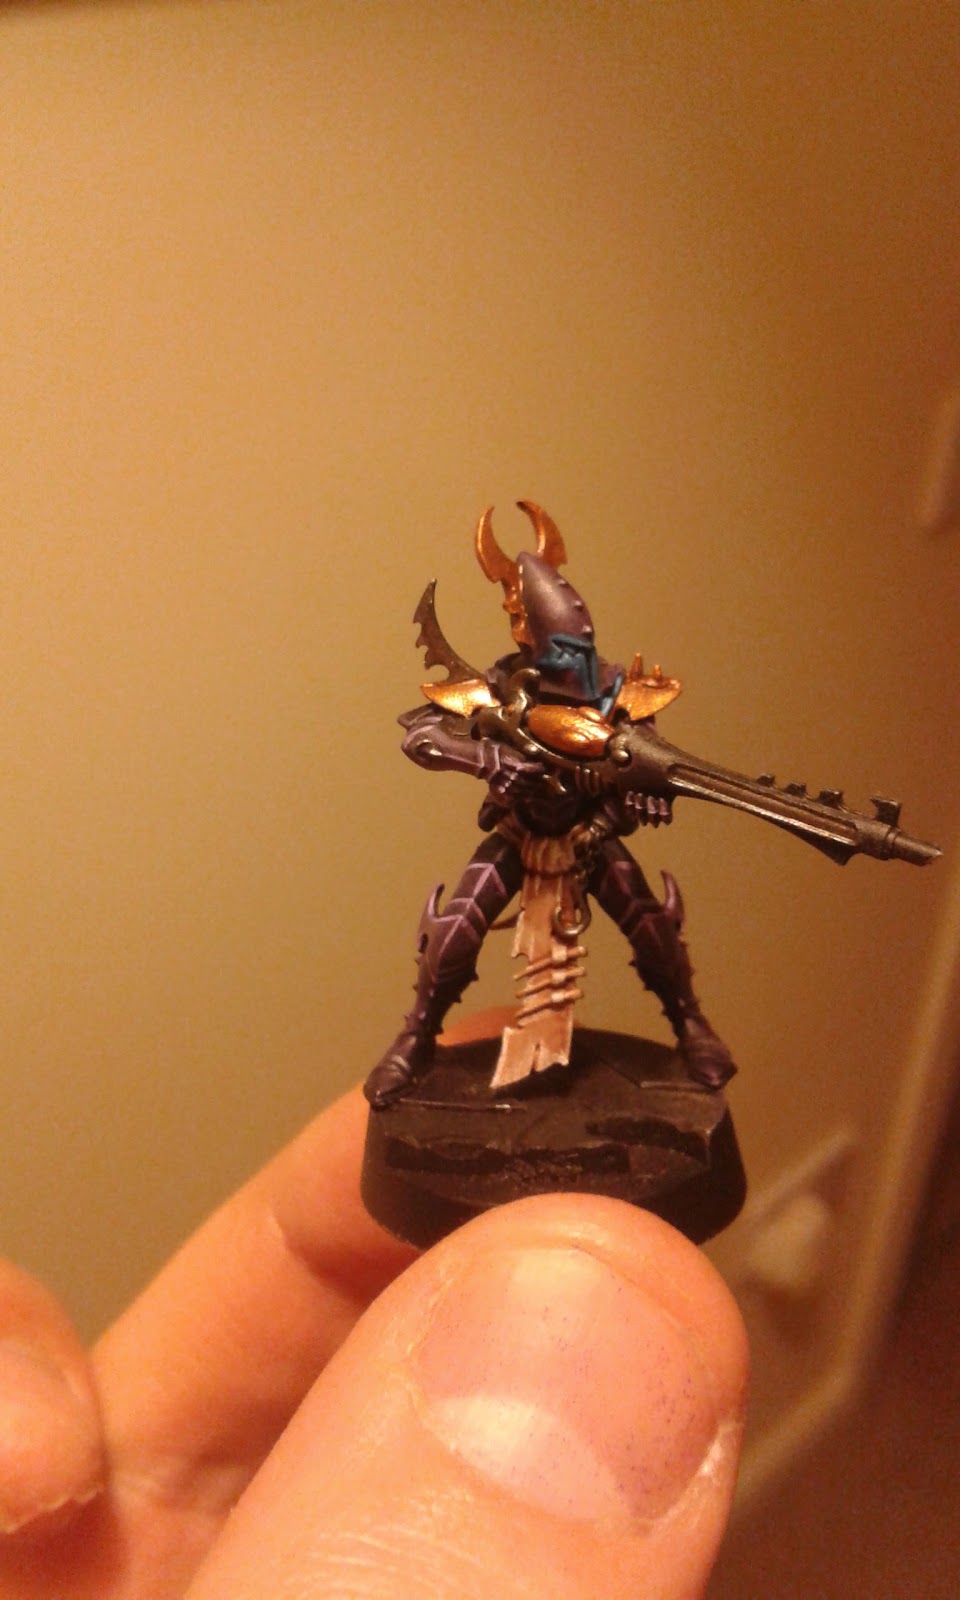
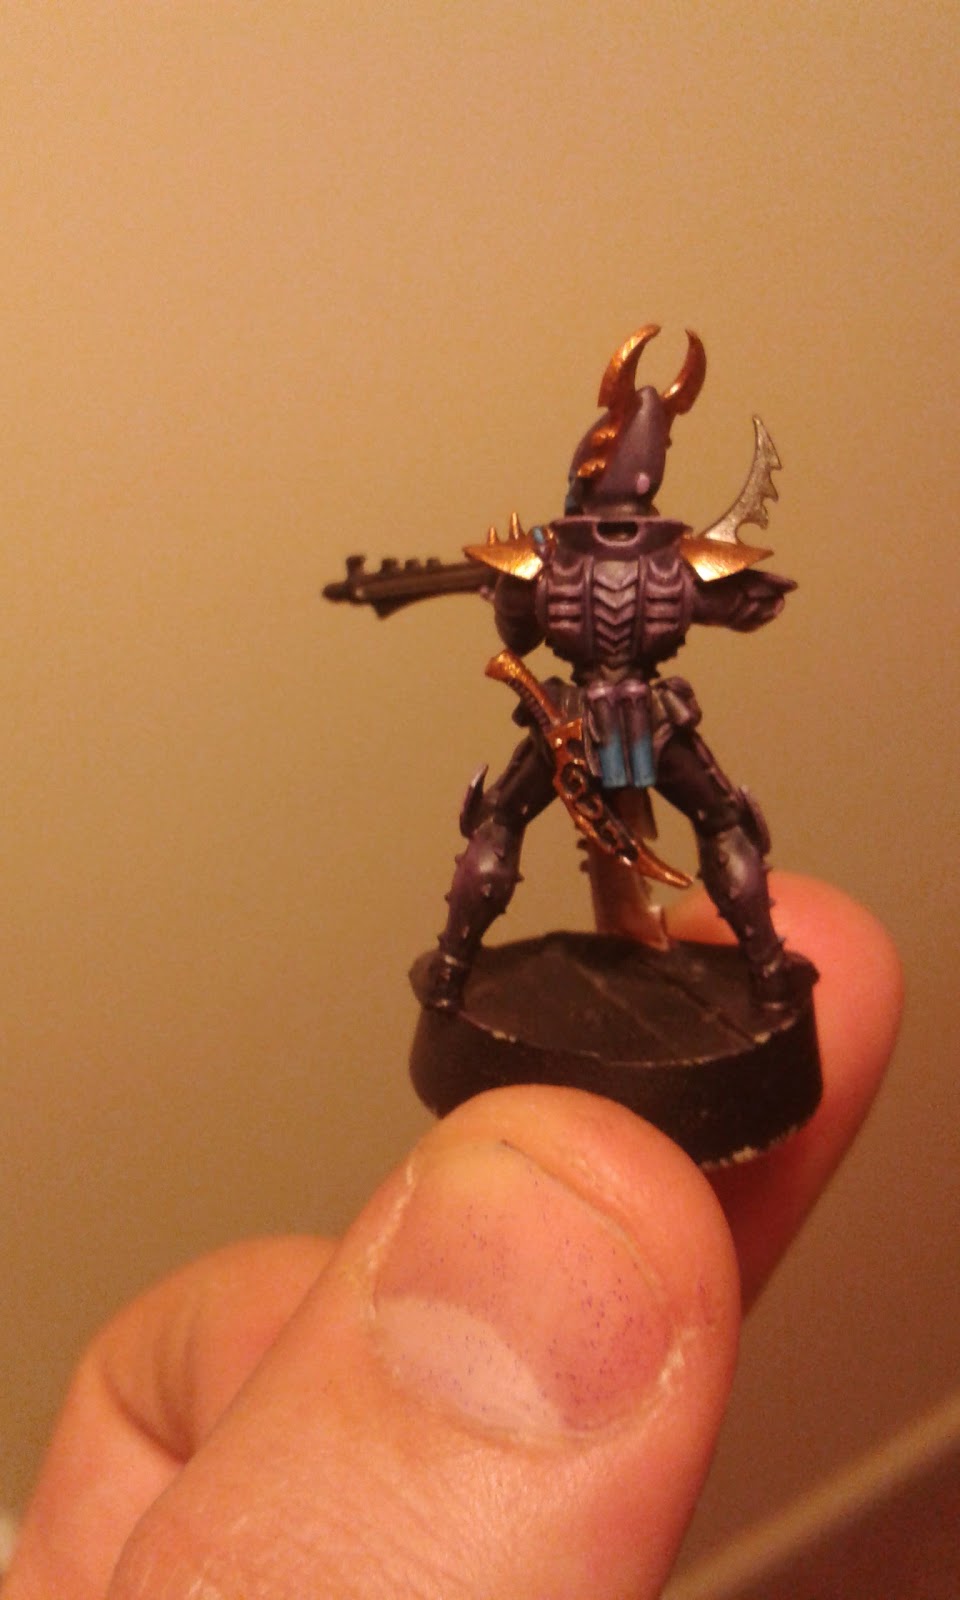
Thursday night I went back to my Raiders and did the bases before I move on to the Kabalites, as the ones I'd done "yellow" (Don't ever try and shade this with Nuln Oil) had just gone a slimy green. I think they look much better with the light grey and it makes the Purple stand out a lot more, I'm pretty happy with these now and I think once I've gone back and done the crew they'll look pretty good. (Or at least to a level I'm happy with! :) )

Tuesday 17 March 2015

Kabalite Test Figure Complete


Finished the test figure last night and I'm pretty chuffed with it for a quick scheme..

Took a bit longer then I thought to finish off as I started to base it by line highlighting the Alien Temple base but I didn't like the look of it and felt it was taking focus away from the figure so I went back and painted it grey in the end which I'm satisfied with.

Things I'm not quite sure about:

The brown pouch, could be grey instead to limit the palette as it looks out of place?

The red ribbons (For want of a better name) I'm not sure about either, I like the idea of putting a bit of red on the model but I'm not 100% sure this is the right place for it.

Overall though, I'm happy that I can replicate these results at a decent pace and at a standard I'm happy with as I've never been a great painter.

I'm going to try and get another few of these painted up next week as a batch of 5 to see how quickly they can be done and hopefully I will be able to post about my success when I get back from our holiday.

Just as a heads up, as a result of going on holiday next week I'm unlikely to be posting here until the end of the month now (Potentially a quick one on Thursday to let you know how my latest round of the Escalation league went - Last one at 400pts for me this week before the jump to 750)

Monday 16 March 2015

Kabalite Test Figure // Second attempt at first play through Imperial Assault


Friday - Imperial Assault

Spent Friday evening starting the Campaign for Imperial Assault with a second group on Friday night, this being a group with mates I normally game with on a Wednesday rather than the previous group which was guys from work who were interested in trying it.

It went down much better this time and we had a blast.

A couple of the guys weren't able to make it so there were 3 of us total in the end with 2 Rebels and me as the Imperial. I'd read that the missions are more balanced with 4 hero's and this gives us the option of other people joining in future missions, so each player chose two heroes and we skipped the tutorial to start with the first mission - Aftermath.

The rules were grasped very quickly and the mission went well, with the Heroes quickly blowing away the forces outside the building and getting in, only to have two of them trapped inside and surrounded.

The party fought their way out of trouble though and despite my exploding Probe Droid antics, the final terminal went down on the last round, with a couple of actions to spare.

We then went on to Diala's story mission and I won't pop any spoilers here, but it was awesome, the Rebels seemed to breeze this one a bit but it could have been a lot different at the end when I thought the last Imperial was alive to attack back with 1 health left, only for Diala to use Force Push and smash him back against a wall for the kill. 

By the end of the evening the guys were both asking when we could get the next game in and were very excited about the combination of advances and equipment they now had. (Diala with a lightsaber and Balanced Hilt looks like she'll be nasty)

----------------------


Saturday - Airbrushing (Apologies for poor pic)

Saturday evening I managed to pull the airbrush out while my wife worked on a dress for the girls for Easter, I managed to pull my airbrush apart and clean it and finally found what was causing some niggling problems, the Nozzle had some dried paint in it and once that was cleared it was much better again (although I'm still finding it clogs up very quickly and I have to pick paint off the needle every minute or so to prevent splatter)

I got some Kabalites primed black and did my Flying Bases black as well as I have started to prefer that since I did it with my X-Wing mini's.

Then I thought I'd make a start on the flyers themselves and a Venom so I sprayed on a thin dusting of Vallejo "Alien Purple" before going in and trying to pick out the edges and raised bits with the same colour. 

With my Raiders I had previously used "Drakenhoff Nightshade" to wash over them through the airbrush and this had worked well but I had seen a video tutorial that used the Vallejo Purple Ink instead so I thought I'd give that a go.

In the end I definitely prefer the first method using Drakenhoff Nightshade, with the Vallejo Ink I found that the ink coloured by itself, more than blended my colours together which I think is what I liked about the GW version. I'm sure that's working as intended, but for my purposes it wasn't quite what I was looking for so now I'm not sure whether to leave as is, or to do them again with the Drakenhoff Nightshade.

For now I'm edging towards "they'll be ok" but I'll have a look at them next to the Raiders before deciding.

----------------------


Sunday - Kabalite Test Mini almost finished

Sunday was Mothering Sunday in the UK so we bought takeaway in the evening from a nice curry house locally, my wife obviously didn't trust me cooking for her and probably a fair shout that.

Didn't have too much time left in the evening but I wanted to test the colour scheme for my army on a Kabalite, given that I seem to be moving away from a Wych Cult and more towards Kabal.

I found a good tutorial on a quick paint scheme here and used that with some changes in colour for my own Kabal. (Subbed the Turquoise for two drybrushes of Alien Purple and then Dechala Lilac for the final highlight, before washing with Draknhoff Nightshade // Eyes were done with Teclis Blue / Lothern Blue and then washed with Asurmen Blue)

It's not quite finished yet but I'm happy with how it's coming out, I did about 1.5 hours on this last night and another half hour it should be finished which for me is pretty quick. I think if I did them in batches of 5 I could do 5 in 6 hours, which is about 3 evenings painting for me.

Hopefully I'll be able to post up the finished Test Mini tomorrow

Thursday 12 March 2015

Dark Eldar Combat Patrol at 400pts - Imperial Guard (No pics again I'm afraid)

Same list as the previous game but repeated here in case you're reading through archives:


5 Kabalites with Blaster (Warlord here)
Raider with Disintegrator Cannon and Enhanced Aethersails

5 Kabalites with Blaster
Raider with Disintegrator Cannon

5 Kabalites with Blaster
Raider with Disintegrator Cannon

Venom with 2 Splinter Cannons

His list was something like: (Pardon my butchering but I don't know what the leaders etc. are called)

Platoon:
Command Squad: Sergeant, Grenade Launcher, Autocannon, 2 grunts
Squad 1: Autocannon, Grenade Launcher, 8 grunts
Squad 2: Autocannon, Melta Gun, 8 grunts
Squad 3: Missile Launcher, Grenade Launcher, 8 grunts
Squad 4: Missile Launcher, Melta Gun, 8 grunts

Wyvern (I think?) Had 2 Barrage 2 shots at S4 each turn.

Mission: The Scouring (Fast Attack are 1 additional VP, random points for objectives)

First Turn: I win it and deploy first/go first

Deployment:

2 Raiders and the Venom on my right behind a ruins, the other raider goes on the left as I was hoping to get a side shot on the Wyvern (Didn't think that through probably)

He deployed the Wyvern in the far left corner and diagonally, I'm not getting a side shot on that from anywhere. Squads 2 and 4 go on the left deployed separately but both in front of the Wyvern, one in ruins, the other in the open.

Squads 1 and 3 combine into a blob and sit on the right in ruins, with the command squad behind them.

He failed to seize, we flipped the objectives to find them laid out as below:

My near left corner: 3
Far left corner: 3
Central and about 10" on: 2
Pretty much centre of table: 2
My near right corner: 4
Far right corner: 1

Initial assessment is it's quite nice for me, I have the 4 already, and feel he'll struggle to get to it with his horde of infantry, he has a 3 and a 1, but the others are unlikely to be claimed by him as he's not particularly mobile. The Wyvern will worry me once I'm dismounted, but needs a 6 to glance before then, the Heavy weapons are concerning, but there aren't "that" many of them and I'm happy jinking and taking my chances, I'm not sure he has enough weapons to down all 3 raiders and a venom, and if he doesn't manage that, I can dive on the objectives at the end.

Turn 1

Night Fighting is in effect. Top left and bottom right objectives are nothing of note, his blob squad is sitting on re-roll 1's though...

Raider on the left moves forwards and the DC and Kabalites fire into the front Squad with the Autocannon, which breaks and flees off the board.

2 Raiders on the right start chipping away at the blob and kill I think 3 of them, can't draw LOS to the Command Squad.

Venom moves forward and shoots the other squad on the left and kills 3, they stay put though.

No Movement from the Guard, the command squad and blob squad shoot two separate raiders which both jink, one takes a HP. On the left the Wyvern shoots the Raider and fails to glance, the missile launcher misses (jinked raider here too)

 Turn 2

Raider on the left moves forward 6" and fires at the guard in front again, joined by the Venom, I think maybe 3 left in the unit after this but they stay around again.

Raiders on the right get a bead on the Command squad and kill 3 of them, leaving the Autocannon and the commander alive after he passes LOS.

Wyvern fires and hits with 4 again but fails to glance, Missile launcher fires and misses.

On the right the blob shoot one of the Raiders which explodes killing 3 but leaving the Warlord and one kabalite alive.

Command squad move out of site of the other raider and the AC snap shoots at the venom and shakes it.

 Turn 3

The other raider on the right disembarks it's passengers who go and sit on the 4pt objective, it then moves closer to the blob squad.

Venom moves onto the centre objective and snap shoots at the Command Squad, between this and the DC on the left raider they finish them off.

The Squad inside the raider on the left shoot at the remainder of the unit in the ruins and finish them off leaving the Wyvern in the top left, and the depleted blob squad occupying the ruins in the top right (maybe 15 left here still)

Blob squad shoots at the raider and immobilise it. Wyvern hits but fails to pen the other Raider again (Not sure why he didn't shoot my dismounted kabalites but think he had given up by this point)

 Turn 4

Left Raider nudges forward to get Line Breaker and the objective, the squad inside shoots the Wyvern but miss

Right raider is immobilised but fires into the blob squad killing 1, it's passengers are still sat on the 4pt objective in my DZ.

Warlord and the other kabalite jump into the empty, immobilised raider and throw some fire at the blob.

Venom shoots into the Blob squad and kills 4-5 including the autocannon, they pass their LD test.

Turn 5

Kabalites sit on 4pt objective, Raider in top left has a 3pt objective, my Venom moves back 12" into my bottom left onto the other 3pt objective.

Venom and Immobilised Raider fire into the blob squad again and kill a few more, they pass their LD again.

Kabalites in the top left raider fire at the Wyvern next to them again but still can't hit it (it's about 3" away!)

Wyvern fires into the Raider in front of him again but can't pen it still, missile launcher and the grenade launcher from the blob shoot the immobilised raider but can only glance it down to 1HP.

We roll for game to carry on and it doesn't,

13 to 1 victory for the Dark Eldar  (4VP, 3VP, 3VP, Slay the Warlord, First Blood, Linebreaker)

Conclusions

This list seems very effective as it's able to take on a wide variety of targets and once it gets up close it's pretty brutal with a lot of rapid firing poison. I was worried about the amount of guardsmen but actually the list has the ROF to take out a good amount of them even if most of the time they were in 4+ cover.

I think I played it reasonably well, I probably should have kept all the raiders together, and maybe ignored the blob squad as I never really hurt it much, but overall it worked out well.

Looking at his list I'm not sure how he would ever have got to the objectives he needed to be honest.

Thoughts?

Dark Eldar Combat Patrol at 400pts - Battle Report vs. Orks (No pics sorry)

So took my Dark Eldar down to the club again last night and had a couple of games, this is the list I took down, I've kinda given up on Wyches at this level as I came upon the situation last week where I had NOTHING that could scratch his tanks after first turn because the only real anti tank was the Raiders themselves.

I'll post a second Battle Report later today/tomorrow with my second game

5 Kabalites with Blaster (Warlord here)
Raider with Disintegrator Cannon and Enhanced Aethersails

5 Kabalites with Blaster
Raider with Disintegrator Cannon

5 Kabalites with Blaster
Raider with Disintegrator Cannon

Venom with 2 Splinter Cannons

First game was against a good mate who I'd arranged to play as I got a bit frustrated with "lack of clarity around rules" last week and just wanted a relaxing game where I didn't have to check the rules every couple of minutes.

He is doing a Luftwaaaghfer (get it!?!?) Ork army with a distinct aerial theme so I was kinda scared of his bomber but hoped to avoid it without taking too much damage. Please note this is a very fluffy list and I'm fairly sure it is not intended to be competitive at this level.

Snikrot

10 Ork Boys with TL Shoota on Nob and a Rockit Launcha
Ork Truk with Rockit Launcha

Some sort of artillery piece with 4 grot crew? S7 AP2 gets hot - Looked really cool :)

10? grots with Runtherder (Warlord)

Blitza Bomber

---------------

Relic Mission

He won first turn and deployed the Ork Truk on his right flank (my left) with the Runtherds on the left and Artillery in the centre in ruins.

I deployed everything on my left opposite the truck and in some cover from the artillery.

Tried to seize and failed, rolled for the plane to come on in T2 and it will do so.

Turn 1

His first turn moved Truk forward a little onto a hill and the grots on my right move forward into some ruins, takes some shots at the raiders with Rokkits and Artillery but they only manage a glance on one of the raiders.

I moved forward with the 3 raiders towards the trukk, while the Venom heads to the middle of the table and targets the Artillery, killing 2 of the crew and putting a wound on the gun itself. everything else shoots at the Trukk and then the Trukks crew and blow it up, leaving (I think) 4 guys left including the Nob and Rokkit Launcha.

Turn 2

The Bomber comes on next to the grots on the right and targets the Venom, it doesn't jink but takes a Crew shaken result from the Super Shoota on the Bomber. Snikrot comes on from my table edge and into some woods. The orks clamber back into their wrecked trukk and use it as cover whilst shooting in vain at the Raiders.

Artillery then fires at the centre raider which jinks.... but it scatters onto the raider next to him and blows it up, killing 2 in the process including my warlord. They pass their pinning and disembark towards the relic

Raiders move forward further towards the remaining 3 guys in the Trukk, dismounted warriors move to claim the relic. Venom moves right up to the Artillery piece.

Shooting everything targets the artillery first and takes it out, before pouring the remainder into the 3 ork boys on the Trukk, who go to ground and make about 11 out of 14 saves to leave just the Nob on one wound. He passes his leadership test.

Turn 3

Bomber zooms over the Venom and drops a bomb on it, whilst the grot on the back shoots into it, no damage however as they either miss and/or fail to penetrate. Remaining Nob shoots and hits the raider again (I don't think he missed a shot all game despite needing 6's most turns!) but fails to glance/penetrate, Snikrot advances to try a 12" charge against the Warriors holding the relic but fails in his roll.

One unit of kabalites disembark to shoot at the Nob in the raider while the other unit of kabalites take the relic and jump into the recently vacated raider, which mvoes 6" back pointing it's guns at Snikrot. The venom also faces Snikrot down and he failed enough cover saves to die.

Kabalites on foot shoot into the Nob and he finally fails a cover save, having passed about 13-14 during the game!

Turn 4

Bomber flies off the table, grots shuffle around to protect Runt Herder.

Raider with objective moves back a bit more, other Raider and the Venom shoot at the grots and kill a couple

Turn 5

Grots shuffle, little they can do really with s3 guns against the Raider/Venom.

Blitza comes back on and bombs the Venom again but it survives.

Kabalites ensure linebreaker and Venom kills a few more grots, they take a leadership test but pass.

Game ends at the end of T5

DE: 5 (First Blood, Linebreaker, Relic) vs Orks: 1 (Slay the Warlord)

Overall I felt I had a pretty brutal list against quite a fluffy list so I'm not surprised with the result but John is a great guy and a smashing opponent so we had some fun imaging the Nob cowering for cover whilst taking surprisingly accurate pot shots at the Raiders!

Hopefully his list will come into it's own at higher points and we'll get a rematch in, those grots would be rather more effective manning the guns in a huge Orky Air Control Towa (Bastion) don't you think?!?!

Monday 9 March 2015

Harlequin Baby Steps // Imperial Assault first play


So still haven't managed to get my Raiders finished as I spent Friday evening playing Imperial Assault with some friends from work and didn't get much time for hobby bits Saturday/Sunday evenings.

My willpower did however fail on Saturday evening and instead of pulling out my paints to put some finishing touches on the Raiders and start on their bases, I pulled out some of the new Harlequins to start assembling instead.

Managed to get two normal troupes and a Shadowseer assembled over the two nights and was impressed with the kits and how well they go together, while similar in form to my Wyches, the shoulder pads come together much nicer and are far less fragile.

One thing I did notice is that the weapons I had hoped to kit out my Harlequins with, I'm not going to be able to do without conversions and/or buying bits online, as you only get 2 Caress in the box. (I wanted 4)

For those interested, there appears to be 2 Caress, 2 Embrace, while there are plenty of Swords and Kisses.

For the first box I'll probably just do the Troupe Master with Sword (Storied Sword) and 2 Caress with the rest being Kisses, as my conversion skills just aren't likely to end up looking good and I don't want to mess these guys up.

For the rest of my Troupes though, only being able to do 1 caress plus the TM with Caress is not going to be great, any ideas where I could get extras? Most of the bits sites I can find in the uk seem to either not have them in stock, or not even have them listed yet.

-------------------

On a separate note I played Imperial Assault for the first time on Friday, initial thoughts are that it's a decent game, but the time limitation on the Rebels makes it really tough and they kind of have to power through as quick as possible to achieve the mission.

We played through the tutorial before moving onto the first campaign mission Aftermath, which was fun, they used the characters from the tutorial so we had 2 melee and 2 ranged, with the Jedi and Wookie as melee, and the Smuggler and Veteran as ranged.

Came down to the last action of the last hero to smash the final terminal and win the scenario for the Rebels so couldn't have been closer really.

Second mission was a Side mission and the group chose to go for Fenn Signis' class mission "Bushfire", this was a really tough mission and it felt next to impossible for the Rebels to win it within the time restriction, perhaps if this had been done with a more experienced group later in the campaign it would have been easier.

Overall I think it will see some play, and I'm interested in my next session on Friday as I'll be trying it with some friends I normally play 40k / X-Wing etc. with so it's something of a change of pace. If that group enjoys it then we'll likely play through the campaign, if not then I'm not sure this will get pulled out again and may end up being ebayed.

I think it's got potential, and we did enjoy it, but I'm not quite sure why it's got the rave reviews it has from some quarters unless it's purely because it's Star Wars.

Anyone else played this?

Thoughts on sources for Harlequins bits?

Wednesday 4 March 2015

Harlequin Weapon Math - Anti Tank and Final Conclusions


Hi guys,

Next instalment and likely the final one looking at the various Harlequin Weapons and their effectiveness vs. a variety of targets.

These are the findings for the various weapon options on the charge vs Vehicles, followed by a summary of the various findings so far and my conclusions.

AV10

Weapon
Glance
Penetrate
Total
Efficiency
Caress
1
0
1
0.04
Kiss
0.44
0.22
0.67
0.033
Embrace
0.33
0.67
1.44
0.072
TM with Caress
1.25
0
1.25
0.031
TM with Kiss
0.55
0.22
0.78
0.019
As expected the Embrace leads the way here as those additional S6 hits make the difference, whilst their normal attacks are still effective for glancing on a 6 with Furious Charge making them S4. If you're going after AV10, Embrace is far and away what you want.

AV11

Weapon
Glance
Penetrate
Total
Efficiency
Caress
0.67

0.67
0.030
Kiss
0.11
0.11
0.22
0.011
Embrace
0.33
0.33
0.67
0.033
TM with Caress
0.83

0.83
0.021
TM with Kiss
0.11
0.11
0.22
0.006
Depending on what you want here the Caress and the Embrace are equally as effective, if you're just trying to knock off HP then they're both just as good as each other, you can't destroy it with a penetrating hit unless it's open topped anyway, so although you might shake/stun/immobilise/weapon destroyed, you're more likely to glance it to death. 

There is definitely a bonus in having those results vs. not having those results though so the Embrace would still come out on top here, with the disclaimer that if you're charging something with 1 or 2 HP left, you're likely to pop it either way.

AV12

Weapon
Glance
Penetrate
Total
Efficiency
Caress
0.67

0.67
0.03
Kiss
0.11

0.11
0.006
Embrace
0.33

0.33
0.017
TM with Caress
0.83

0.83
0.021
TM with Kiss
0.11

0.11
0.003

Definitely start to see the tables turn here and the Caress is twice as effective as the Embrace, still causing 0.67 glances per model while the Embrace is half of that, at this stage 4 Caress would give you 2.64 Glances, while your 4 Embraces are at 1.32.

AV13 + AV14


Weapon
Glance
Penetrate
Total
Efficiency
Caress
0.67

0.67
0.03
Kiss


Embrace


TM with Caress
0.83

0.83
0.021
TM with Kiss


Obviously no competition here, the Embrace can't touch the higher AV vehicles while the Caress is still just as effective, it's likely however that you won't see as many high AV vehicles, and if you do see them, it's quite possible you'll be shooting Haywire from elsewhere in your list into them, so although it's a big advantage to the Caress, depending on your local meta, you may not want to read too much into that.

Summary:

So what I wanted to do is to put various configurations suggested into play against a variety of targets and give you an idea of what wins out where, from that, you can come to your own conclusions as to how you'd want to include in your lists.

I'll be using 3 different loadouts that I think could be effective, namely 4 Emrace, 4 Caress and a mix of 2 Embrace and 2 Caress. In every case I've included the Troop Master with a Caress as it's the most effective weapon on him in the majority of cases.


So the end result seems to be... It depends!

If you're charging any infantry target, and expecting to be there for 2 rounds of combat, the Caress is definitely the best option.

If you're charging infantry but only expecting to be in combat for 1 round, then they're the still the best option, unless the infantry is T3 5+ save in which case the Embrace wins out by forcing lots of saves.

If you're charging a vehicle, then again, it depends on the circumstances.

If it's a single AV10 Vehicle, charge it with whatever you like, it's likely to go down through weight of attacks. If it's a multiple charge on several AV10 vehicles (Not sure how relevant that it) the Embrace wins out, but against one vehicle, it's likely just overkill.

If it's an AV11 vehicle then the Embrace is the best option, both the Caress and the Embrace average 3.5 Hull Points, but half of those from the Embrace are penetrating, so you'll likely get shaken/stunned/rip a weapon off etc. if it survives.

For AV 12 the Caress is much the better choice and a unit with 4 Caress and a Troupe Master with Caress will basically average 3.5 HP off anything, which is nice easy math. :)

Obviously for AV13-14 only the TM is contributing for the Embrace, whereas the Caress still do the same damage, so again, against high AV the Caress is the best.

Conclusion:

I think when building you'll need to think about what you'll be charging into, but hopefully this little series has given you the information you need to make an informed decision based on your meta.

If you see a lot of infantry hordes, or AV10 packed closely together, then the Embrace is great, for me, I feel that the Caress is the best option for most situations, and if I want a cheaper option I'll throw the Kiss in there with it as I like the option for Instant Death, as well as the AP2 and the fact that it's an iconic Harlequin weapon.

I can see why the Embrace seems great when you look at charging in and doing those impact hits, but I feel that in the vast majority of situations you want to stay in combat during your opponents turn, and then hit and run out to charge in again or move elsewhere, and in that second round of combat the Embrace offers you absolutely nothing.

For me, based on the above I'll likely be running a mix of Kiss/Caress, or purely Caress. Prior to doing this series I had thought of 2 of each in a 5 man unit but looking at the results I think  I'd likely go with 3 Caress and 1 Kiss.

So depending on what I'm running in (Star Weavers / Raiders / On Foot) I'll be doing something like:

5 man Troupe (3 Caress // 1 Kiss // TM with Caress) - Insert Shadowseer here (In Starweaver)
8 man Troupe (4 Caress // 1 Kiss // TM with Caress) - Insert Shadowseer and Succubus here (In Raider)

Hopefully this has been useful / interesting - If anyone has any questions or thinks any of the math is wrong please let me know.

Rich

Tuesday 3 March 2015

Dark Eldar Raider Update - Nearly There! (Photo Dump)


Got a bit further with the 3 raiders last night, put some washes on the metals and then went over some of the Hex pattern on the sails to make it stand out a bit more. Picked out a few details and hopefully one more night and they'll be done bar the crew.


Not a great standard but for what for me is a very quick job, (3 Raiders will have taken 6 nights total - or about 12 hours) I'm very happy with them.

Further Photos:


Further Harlequin Weapon Math - Best option vs Invisibility

Hi guys,

it was pointed out to me on another blog that while the math was helpful, that I hadn't accounted for the fact that the Embrace hit automatically and as a result was much better against targets with Invisibility.

I wanted to make sure I was giving the full information and so I figured I'd do additional math on the effectiveness of the weapons vs a unit with Invisibility (For now I've stayed with MEQ but I believe this would also work for Eldar Jetbikes as they're T4 3+ save?)

Once I've done the rest of the math I'll put up results for the various weapons against Marine Bikes with Invisibility and anything else that might be requested in the comments.

Ok!

So your unit of 5 Harlequins somehow gets into contact with a unit of Eldar Jetbikes with Invis on them, we'll assume all 5 hit home simply because the casualties would be the same regardless.

On the Charge the weapons match up like this:

Weapon
Kills
Efficiency
Caress
.67
0.029
Kiss
.22
0.011
Embrace
.67
0.500
TM with Caress
.83
0.019
TM with Kiss
.25
0.006
TM with Power Sword
.42
0.008
TM with Storied Sword
.56
0.009

So unless there are Invulnerable saves, the Caress and the Embrace are pretty much equal, with the Embrace being slightly better as it's cheaper, however there is something to be said for hitting at I10 and then 6, and with Invulnerable saves it weights more heavily towards the Embrace. I don't know how to model this though, how many Invulns are you likely to get in a Deathstar type unit like that?
What sort of invulns?

My concern is primarily about the second round of combat, as you've now hit home with your embraces and gain no further benefit, whereas each roll of 6 to hit with the caress is a AP2 Instant Death.

The second round of combat (or if you're charged) works out as:

Weapon
Kills
Efficiency
Caress
.50
0.022
Kiss
.18
0.009
Embrace
.06
0.003
TM with Caress
.67
0.017
TM with Kiss
.19
0.005
TM with Power Sword
.89
0.018
TM with Storied Sword
.33
0.006

So putting those together this is how the combats average out when both units are charging a unit of Invisible Jetbikes:

Loadout
Kills
2 Kiss, 2 Caress, TM with Caress
2.61
4 Embraces, TM with Caress
3.51

And this is if the unit is charged by the Jetbikes or is in a subsequent round of combat:

Loadout
Kills
2 Kiss, 2 Caress, TM with Caress
2.02
4 Embraces, TM with Caress
0.89

Across two rounds of combat:

Loadout
Kills
2 Kiss, 2 Caress, TM with Caress
4.63
4 Embraces, TM with Caress
4.40


If anyone has any feedback regards the loadout of a unit of jetbikes so I can see what else comes into it I'm happy to incorporate that, but for now I still hold out that a mix of Kiss and Caress is a very good option for the Harlequins, especially given that ideally they'll be spending two rounds of combat, then using hit and run to get out of there and charge again.

Embrace does have more punch on the charge however and that difference of 0.9 casualties on the charge could mean 1 less model hitting you back so I can definitely see the value there, I would just prefer something that can still cause damage if charged and/or in subsequent rounds.

If the target is T5, it swings back in the favour of the Caress.

*Updated with correction from Charlie*

Any questions or comments around further things I need to take into account guys?

What other units should I be taking into account?

Thanks for reading,

Rich

Monday 2 March 2015

Harlequin Weapon Math and Exe-Wing

Hi guys,

Just a brief update, I went to an X-Wing store championship event over the weekend and had a great time, it was held by Kirton Games who normally have a store up in Crediton, Devon - However it was held at the hall where our club is normally held on a Wednesday night.

Wasn't expecting to do well at all as I haven't really played for a long time. We went to the release event for the Phantom/Defender a while back and since then I've only played twice, both times using Phantom and 2 Royal Guard.

I decided to go with what I knew though as I've played a lot with 4 x Royal Guard so put "Push The Limit" on them and took them for a ride!

Ended up coming fourth which I was really chuffed with given the lack of playtime and picked up an x-wing dice bag and a set of acrylic focus tokens.

----------


I've also been doing some math on the various Harlequin weapon options and thought I'd share here so that others can either:

a.) benefit from the info
b.) point out my errors

I assumed in all cases that I'd be facing MEQ type troops (WS4 // T4 // 3+ Save) and did the figures for on the charge, and subsequent combat.

Efficiency is calculated as Kills / Points, so a 10pt model with 1 kill would be 0.1, whereas if the same model cost 100pts it would be efficiency of 0.01. The higher the better.

This does not take into account additional uses such as anti vehicle (they all contribute in some way S6 attacks) or taking on other troop types, I may at some point in the future do those separately.

On the Charge:

Weapon
Kills
Efficiency
Caress
1
0.043
Kiss
.89
0.044
Embrace
1
0.50
TM with Caress
1.25
0.029
TM with Kiss
1
0.025
TM with Power Sword
1.67
0.033
TM with Storied Sword
2.22
0.037

Subsequent Combat Round:

Weapon
Kills
Efficiency
Caress
.67
0.029
Kiss
.70
0.035
Embrace
.22
0.011
TM with Caress
.89
0.022
TM with Kiss
.78
0.019
TM with Power Sword
.89
0.018
TM with Storied Sword
1.33
0.022

Conclusions:

Pretty much as expected and the Kiss seems to be the best option for most circumstances in my opinion which is great as it's the iconic Harlequin weapon. Saying that, the Caress or Embrace have more hitting power on the charge and can glance vehicles easier with the S6 auto glance on the to hit roll for Caress (Although no possibility of penetrating AV10 or AV11 which a kiss could do), and the S6 HoW hits from the Embrace. 

From a pure efficiency point of view there doesn't seem much downside to just running Kisses, but I'd probably put in 2 Kiss and 2 Caress I think in a 5 man, potentially with a plain one to soak up the first casualty if I ran them as a 6 man troupe.

For the Troupe Master I will probably run one with the Storied Sword as my Warlord, then the others will just have the Caress to keep them cheaper.

For those interested in the combined hitting power, a unit of 5 averages the following to MEQ on the charge:

Loadout
Kills
2 Kiss, 2 Caress, Storied Sword
6
2 Kiss, 2 Caress, TM with Caress
5.03

And subsequent (or they're charged)

Loadout
Kills
2 Kiss, 2 Caress, Storied Sword
4.07
2 Kiss, 2 Caress, TM with Caress
3.63

Hope that helps some people with their decision making anyway, if any of the Math is wrong, please let me know.

Rich